My homelab story technically began before I knew what a homelab was.
During my fourth year of college, while preparing to graduate as a Computer Engineering student, I attended a required seminar for graduating students in the Engineering Department. The seminar focused on careers and preparing for the professional world. At some point, one of the speakers mentioned a homelab.
I did not know what the word meant. It did not particularly interest me at the time, either. It was one term among many things discussed that day, so I heard it, moved on, and eventually forgot about it.
A few months later, I found a video about homelabs while casually scrolling through YouTube. I do not remember the title or who made it. I watched because I am a technology enthusiast, and this time the idea immediately caught my attention. As the video showed what people were doing with servers in their own homes, I remembered where I had heard the word before.
Homelab.
Until then, servers had felt distant: equipment in data centers or infrastructure managed by large companies. The video made the idea personal. A small machine on my desk could block advertisements across my network, back up my photos, host a Minecraft world for my friends, run automations, and give me a safe place to learn Linux, Docker, networking, and AI.
YouTube did not introduce me to the word. It gave the word meaning. That rediscovery turned into days of research—and eventually into a used Dell OptiPlex sitting on my desk.
Starting with problems I actually had
I was not trying to recreate an enterprise environment. I had three practical reasons to build something.
Advertisements across my devices were becoming increasingly frustrating. My iPhone was running out of storage, so I wanted a local place for my photos. I also wanted to host a Minecraft server that my friends could join without renting one from somebody else.
The experiments came after that: self-hosted applications, automation workflows, network configuration, and local AI models. But the original motivation was simple. I wanted one machine that could solve real problems while teaching me how the systems behind those solutions worked.
I already had a spare 4 GB DDR4 RAM module and a 240 GB NVMe SSD. That made the project feel achievable on a student budget. I did not need a rack, enterprise hardware, or a room full of equipment. I just needed the right small computer.
Hunting for a first server
Once I decided to explore the idea seriously, YouTube and TikTok became my research library. I watched beginner guides, hardware comparisons, operating-system walkthroughs, and tours of other people's setups. Three families of second-hand mini PCs appeared repeatedly: Dell OptiPlex Micro systems, HP EliteDesk Minis, and Lenovo Tiny PCs.
They were popular for good reasons. They were compact, quiet, relatively energy efficient, and capable enough for lightweight self-hosting. More importantly, used units were affordable.
I searched Lazada and Shopee and waited for a sale so I could combine the discounted price with vouchers. Eventually, I found a used Dell OptiPlex 3040 Micro. Its listed price was about ₱4,800; during the sale, I bought it for approximately ₱3,580.
The machine arrived with an Intel Core i5-6500T, 8 GB of DDR4 RAM, Intel HD Graphics 530, and a 500 GB hard drive. After spending so much time researching and comparing options, unboxing it felt like the point where the idea finally became real.
I powered it on before changing anything. It booted into the preinstalled Windows installation, which was enough to confirm that the hardware worked. Then I opened the chassis and began the upgrade.
The hardware mistake that shaped the build
Adding my spare RAM was easy. The OptiPlex accepted the extra 4 GB module, bringing the total memory to 12 GB.
My storage plan seemed equally straightforward:
- Use the 240 GB NVMe SSD for the operating system.
- Keep the 500 GB hard drive for local storage.
There was one problem: the OptiPlex 3040 Micro did not have the NVMe slot I expected.
I had probably confused its specifications with one of the other mini PCs I was considering. I had been so focused on finding the cheapest useful system—and so pleased by the sale price—that I did not verify the storage expansion options carefully enough.
That was my first real homelab lesson. Check the exact hardware, not just the product family. RAM limits, SATA support, M.2 slots, NVMe compatibility, power consumption, and expansion options can vary between models that look almost identical in a marketplace listing.
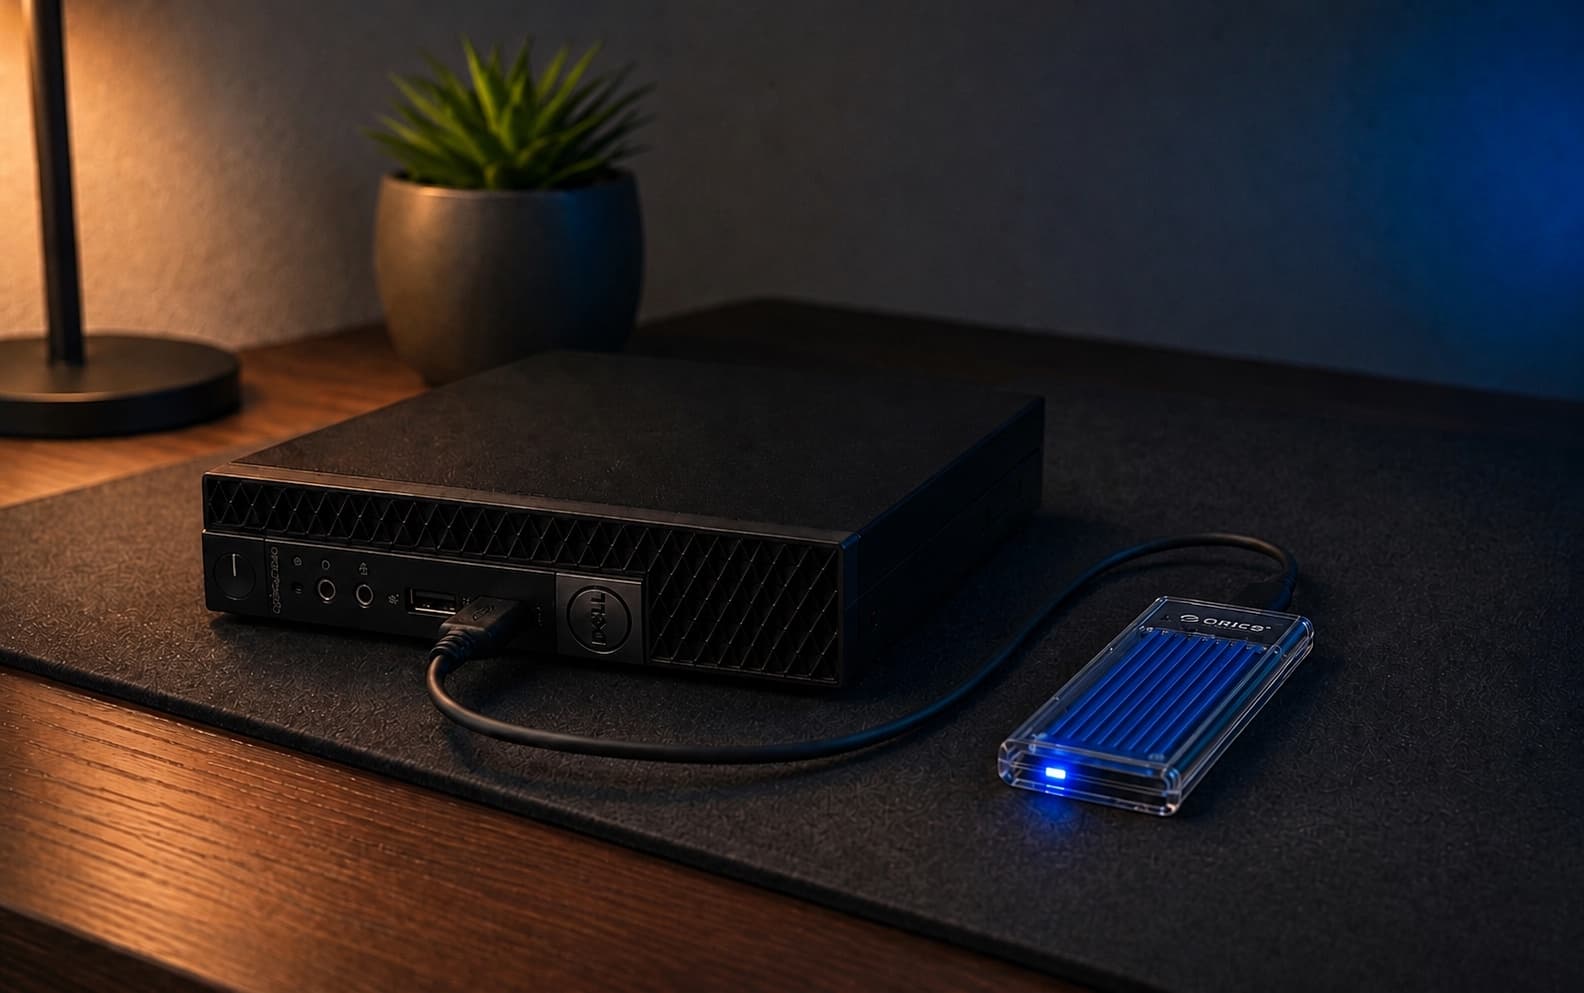
I did not want the mistake to stop the project, so I used a workaround: I connected the NVMe SSD externally through a USB adapter. It was not the clean internal installation I had imagined, but it let me keep building with the hardware I already owned.
The workaround is still a visible part of the setup. I like that. It reminds me that a first homelab does not need to be perfect to be useful.
Choosing an operating system I could grow into
The next decision was the operating system. I considered a traditional Linux server, Proxmox, and ZimaOS.
A conventional Linux server offered flexibility and control, but it also meant more terminal work and manual configuration than I felt ready to manage at the start. Proxmox was appealing because of its virtualization features, yet virtual machines, containers, storage, and virtual networking felt like too many new concepts to learn simultaneously.
ZimaOS offered a gentler entry point. Its graphical web interface made it easier to install and manage self-hosted applications, while still leaving room for me to learn SSH, containers, and the underlying system over time.
I chose ZimaOS because I wanted early progress. Starting with a beginner-friendly interface did not mean avoiding the fundamentals; it meant learning them gradually instead of letting the initial complexity end the project before it began.
I downloaded the image from the official ZimaOS website, flashed it to a USB drive with Balena Etcher, booted the OptiPlex from that drive, and followed the installation process. I relied on the documentation and used ChatGPT when I needed clarification about individual setup decisions.
A few minutes later, the machine booted into ZimaOS. After all the watching, searching, waiting, and hardware workarounds, my first server was alive.
From a monitor to remote management
At first, I worked directly from a monitor connected to the OptiPlex. Once the base configuration was stable, I enabled SSH so I could manage the server remotely from another computer.
That small change made the homelab feel permanent. The OptiPlex no longer needed to behave like a desktop computer. It could sit quietly on my desk while I used the ZimaOS web interface for application management and SSH when I needed the terminal.
Then I started installing the services that had motivated the project.
A Minecraft server my friends could reach
For Minecraft hosting, I installed Crafty Controller and Playit Agent. Crafty gave me a dashboard for managing the server, while Playit provided a way for friends outside my local network to connect.
This was one of the first moments when the homelab became useful to people other than me. A discounted mini PC on my desk was now hosting a shared game world.
Crafty also introduced me to webhooks. I began exploring how a Minecraft server event could trigger an HTTP callback and send a notification to Discord. It was a small experiment, but it changed how I thought about the services I was installing: they did not have to remain isolated applications. They could communicate.
Local photo storage with Immich
Immich addressed the second problem: photo storage.
My iPhone was running out of space, and I wanted to understand what it would be like to operate my own photo-backup service. Installing Immich gave me a local destination for my photo library and a practical reason to think about storage as more than an operating-system drive.
Self-hosting a photo library also raised the stakes. A game server can be rebuilt; personal photos may be irreplaceable. The experience pushed me to think more seriously about storage capacity, backups, and the difference between simply running a service and operating it responsibly.
Network-wide ad blocking with Pi-hole
Pi-hole turned the homelab into part of the home network itself.
Instead of installing an ad blocker separately on every device, I configured Pi-hole as a DNS-level filtering service. The important step was configuring the router so devices on the network could use the homelab server as their DNS resolver.
Once that relationship made sense, the setup was relatively straightforward. It also gave me a clearer mental model of how DNS requests move through a network and how one local service can affect many connected devices.
Automation with n8n
After the first services were running, I installed n8n to experiment with workflow automation. One of my earliest workflows was a simple health-check pipeline:
Check the server → process the status → send the result to Discord.
It began as a convenient way to receive logs and notifications, but it introduced a more useful question: what can the server check automatically instead of waiting for me to inspect it?
That was the point where the homelab started becoming an ecosystem. Minecraft events could create notifications. Health checks could report to Discord. Services could provide signals that another tool could receive, transform, and route somewhere useful.
Adding an AI agent through Telegram
I later installed Hermes and configured it as an AI agent for the homelab. I connected it to Telegram so I could experiment with a conversational path into the system:
Me → Telegram → Hermes → homelab tools and services.
For the model, I used a free API option through OpenRouter. This let me explore agent behavior without needing powerful local hardware or committing immediately to paid models.
Hermes also clarified the boundary between automation and agents. A scheduled health check with predictable inputs and outputs is usually better suited to n8n. A request expressed in natural language, where the system may need to reason about the next action, is closer to the kind of interaction I wanted to test with Hermes.
Testing the limit with Ollama
Running a local language model was one of the experiments I was most curious about. I installed Ollama and tested several small, quantized models to find a workable balance between model size, speed, memory use, and response quality.
A model similar to Qwen 3.5 2B using Q4_K_M quantization ran reasonably on the OptiPlex. It was not fast, but it was responsive enough for basic conversations and experimentation.
Connecting the local model to Hermes exposed an important limitation. The model could chat, but it was not reliable enough for agent-style tasks on this hardware. Running a language model and running a capable tool-using agent are not the same thing. Model size, reasoning ability, tool support, latency, and available compute all affect what the system can realistically do.
That result was not a failure. Finding the boundary was the experiment.
What the small machine became
The OptiPlex now connects several parts of my digital life:
- ZimaOS provides the base system and application management.
- Crafty Controller and Playit host Minecraft for my friends.
- Immich gives me personal photo storage.
- Pi-hole provides DNS-level ad blocking for the home network.
- n8n runs automation and reports health information to Discord.
- Hermes connects AI-agent experiments to Telegram.
- OpenRouter provides access to hosted models.
- Ollama lets me test small language models locally.
None of these pieces is especially unusual on its own. What matters to me is that I assembled them, made them communicate, and learned where the setup worked and where it did not.
The homelab taught me more through installation failures, logs, broken configurations, storage constraints, and network troubleshooting than I could have learned by only watching tutorials. The missing NVMe slot became a USB workaround. A basic game server led to webhooks. A health check led to workflow automation. A local chatbot led to a more realistic understanding of AI agents.
Still building
The setup is not finished. The OptiPlex still sits on my desk, and the externally connected SSD still reflects the compromise I made at the beginning.
I want to increase the memory to at least 16 GB, improve the storage, and add hardware as the services demand it. I am considering a dedicated TP-Link router so I can experiment more deeply with DNS, routing, and network architecture. I would also like to build or 3D-print a compact rack inspired by DeskPi systems so the physical setup feels as intentional as the software running on it.
Proxmox remains on the longer-term roadmap. ZimaOS was the right first step because it helped me start. As I become more comfortable with Linux, containers, networking, and storage, Proxmox would let me learn virtualization in an environment closer to professional infrastructure.
My first homelab is not the most powerful or polished setup. It is a used mini PC that I bought on sale, upgraded with spare memory, and adapted after making a hardware mistake.
It is also my game server, photo storage, ad blocker, automation platform, AI experiment, and infrastructure classroom.
It began with a word I barely noticed at a college seminar, resurfaced months later through a random YouTube video, and became a project I am still building.